
My town loves science! Of course we do – we’re where the atomic bomb was built and, since that time, we’ve had a national science laboratory here in our town that fills up our community with scientists from all over the world.
For the past few years, our town has celebrated a yearly Science Festival. Over the years, the name and length has changed all building up to this year, which was eight days of events all across town. There were all kinds of events all over our community – at museums, parks, schools and more. There were author talks and live demonstrations and lectures and hands-on demonstrations of tech – you name it. It all culminated in an ExpoDay with booths, music, live demonstrations, the whole she-bang. You can view the entire festival schedule online here.
Since STEM is so important in libraries right now – rightfully so for all the ways it encourages different literacies and engages our growing users, I decided this was the perfect chance to stick our toes into STEM programming in a major way. So, I announced our library would participate by integrating STEM activities into our regular weekly programming for ages 0-6 AND by adding extra afternoon sessions for 7-12 year olds AND by having a special teen session to go along with our monthly TAG meeting AND having a booth at the actual ExpoDay. You know me: go big or don’t bother.
How did it go? What did we do? What did we learn? Let me share!
Monday
Program: Mythbusters
Ages: 12-18
Source: I first saw the idea on Bryce‘s Sneaky STEM blog and then I raided Pinterest and the actual Mythbusters site for ideas.
Total Cost: Under $2o
Attendance: 14 kids
How Did It Go? The idea was that this would be teen centered programming before our monthly Teen Advisory Meeting where the teens come to hear about the newest books. I was worried about it because it was the first TAG of the school year, so I knew we’d have new teens (I hoped!) and wasn’t sure what it’d be like. But why not try? So, we had Mythbusters RIGHT BEFORE TAG, giving us only half an hour to run the program.
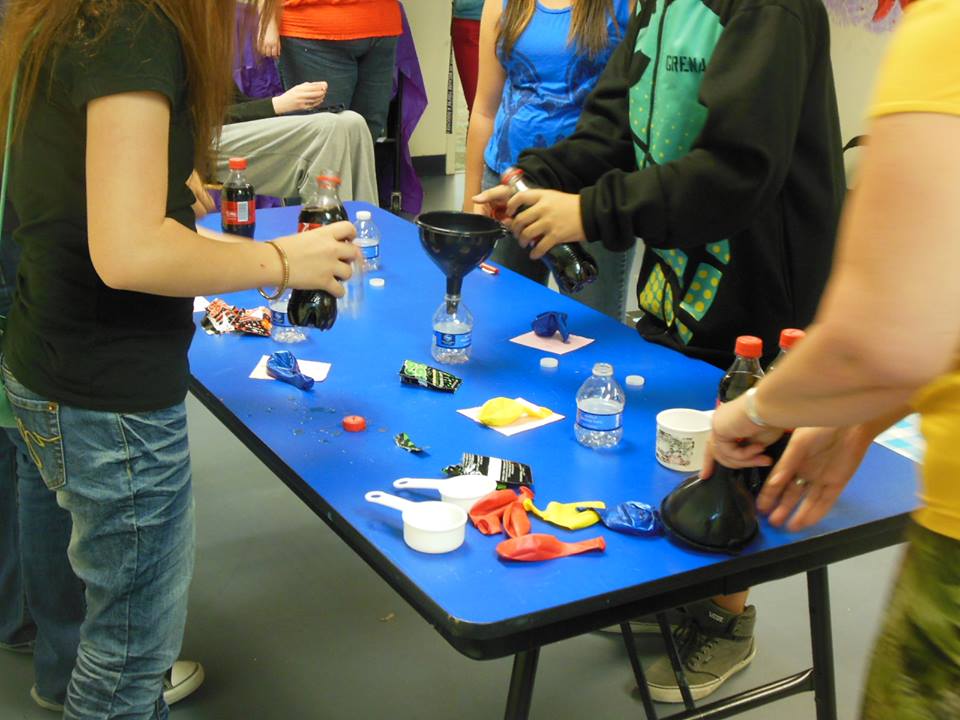
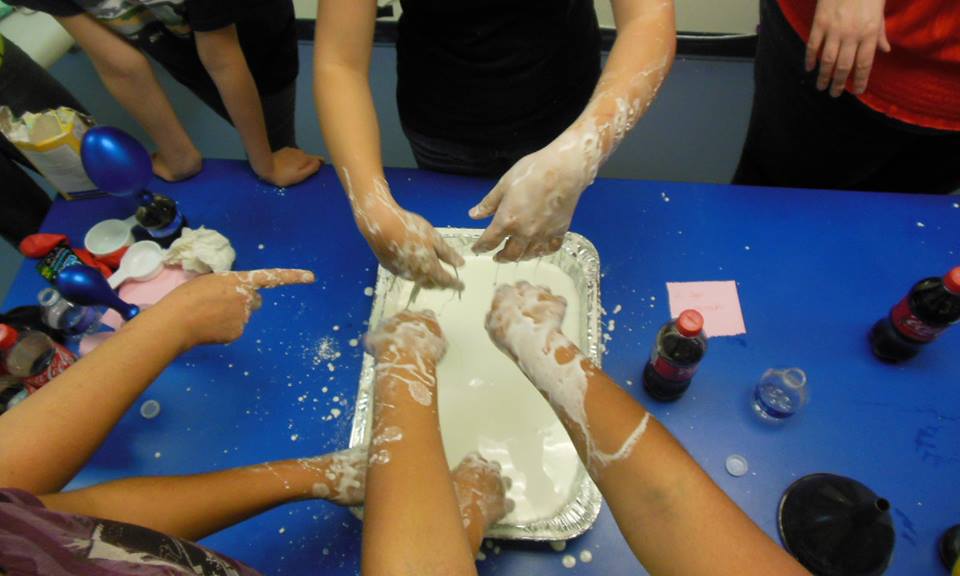
We had three activities planned and we posed them as questions on sheets of paper taped to the wall. The kids had to come up BEFORE each experiment and write if they thought it was a myth or not. After we tested it we wrote BUSTED or CONFIRMED on the paper. Easy way to track it and fun visual too!
The activities were: buttered toast always falls face down (the one we didn’t get to test), Pop Rocks make your stomach explode, and a substance can be a liquid and a solid at the same time.
We ended up rounding up a mess of 12 year olds (with a few 10-11s mixed in) to supplement the program, because most of our older TAG kids were not impressed. I think because they’d seen a lot of it before and because they were there for TAG, darn-it. But even they got a little nervous with the Pop Rocks, which was hilariously fun. We made them measure it out and use different amounts of Pop Rocks and Coke and I shook some of them up, which sent the kids running – convinced it would explode. The younger kids loved digging their hands in the Oobleck and watching it go from solid to liquid as we added more water and cornstarch.
What Did We Learn? This would be a tons of fun program to host for tweens and younger teens. And I’d definitely recommend staging that incarnation of it for a longer period of time. And we maybe shouldn’t have piggybacked it onto TAG … but a lot of the 12-13 year olds stayed and they might not have if they hadn’t had the science part first. Making our decisions about if it was a myth or not was fun and added interest for sure. Talking about how each was busted or confirmed was a good STEM conversation with lots of questions and speculation from the kids. Good time, would do again!
Tuesday
Program: Sensory Bags at Baby Time
Ages: 0-4
Source: I have been transfixed by this idea since seeing Kendra‘s Baby Art in a Bag and Brooke‘s Baby Art. This is also a popular activity for older kids busy bags on Pinterest, so it kept coming up.
Total Cost: Around $20
Attendance: At least 30 parents and babies during the 30 minutes we had the stations open
How Did It Go? JUST LOOK AT THE PICTURE
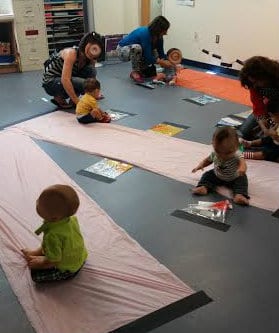
I did something different than art. We took bottles of hair conditioner and hair gel and mixed them in bags with a little bit of food color. We taped them down to the floor and taped down “work mats” for the babies to sit and crawl on. Then we let them at the bags. They mixed colors, they stepped on them, they smushed them in their fists. They felt the texture. They even sat on them. I COMMAND YOU TO LOOK AT THIS ADORABLENESS.

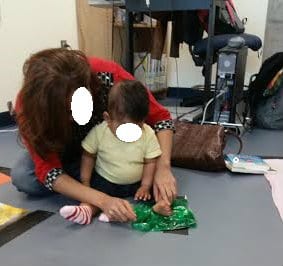 (look how she’s putting her little feet on it! LOOK!)
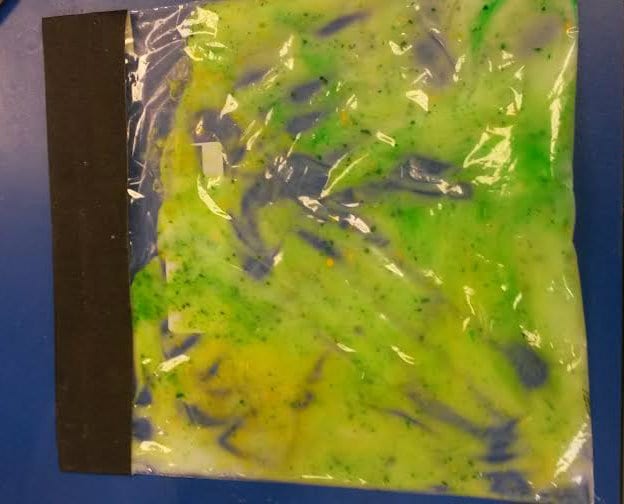
(one of the bags post mixing – the lasted a really long time and no babies managed to get inside.)
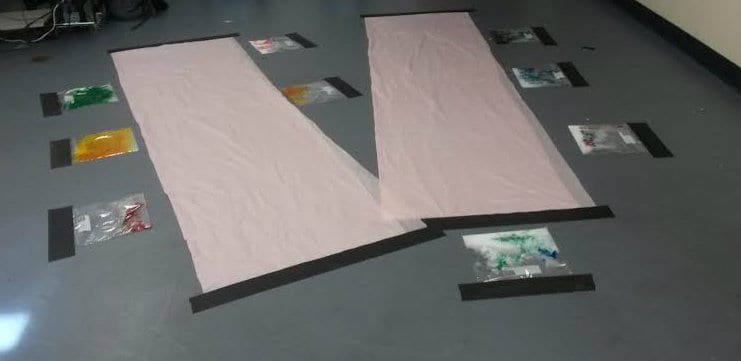 (bags waiting to be mixed. Oh and it should be obvious that besides the mixing, the babies loved crawling, walking, and feeling these cheap plastic tablecloths we taped down. It was a sensory experience itself!)
What Did We Learn? OMG THE SMELL. The smell of the conditioner and gel was overwhelming to me. I wish we had done it in one of our rooms with windows that opened. Other staff said it wasn’t so bad but basically everyone in YS area that day mentioned it smelled like a beauty shop. I think it gave me a serious headache the next day. So, be warned. We also learned to NOT USE SHAMPOO. It quickly melted into a soupy mixture that actually made us gag a little! It just wasn’t thick enough.
BUT using the conditioner and gel over the paint did let us experiment with different textures/mixture levels of gel and conditioner. The babies were especially drawn to the gel (that’s the one they liked sitting and walking on the best) and the way it color mixed.
I think the fact it was a thing most people have at their house made it feel more replicable to the parents, so that was a bonus. This is the program where I got one of the best compliments of my professional life when a mom said, “This is like a Pinterest idea come to life!” YEEEEEEEEES!
I’d definitely do this, or something like this, again. (like with paint this time!) The parents loved it, the babies REALLY loved it, and it gave me a good chance to mingle and talk with them about how even this kind of play is science, how their babies are learning from everything, how sensory play enriches all their learning and even the youngest children can engage in it. Also I got to see tiny babies hammering away with their tiny baby fists at sensory bags so WINNER!
Program: Magnetic Slime
Ages: 7-12
Source: My colleague Melissa ran this program. Originally I had scheduled something about volcanoes because who doesn’t love that but Melissa wanted to try something new. So sure! She found the idea on a blog via Pinterest. (I highly recommend you follow Melissa’s craft board on Pinterest, she is our guru of this!)
Total Cost: We did have to buy the magnets (but then they just wanted to use our magnet wands) and the black iron oxide. That was about $2o. We found them on Amazon. With the rest of it, the glue and liquid starch, I’d say it was all about $3o – but that made plenty.
Attendance: 10 kids. We had this at our branch, where we usually get much smaller attendance, but Youth Activity Center has been temporarily set up next door so we actually had kids show up. This is exciting for when we’ll build our new branch in JUST MONTHS and the YAC will be nearby. Yes!
How Did It Go? Much messier and chunkier than the blog made it look (shocker). The kids didn’t mind this, of course, but it did end up making clean-up basically being throwing lots of stuff away. They liked making the mess just as much as seeing it was magnetic.
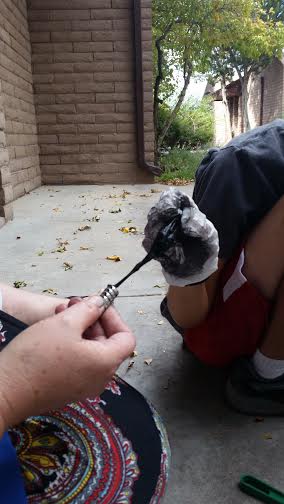
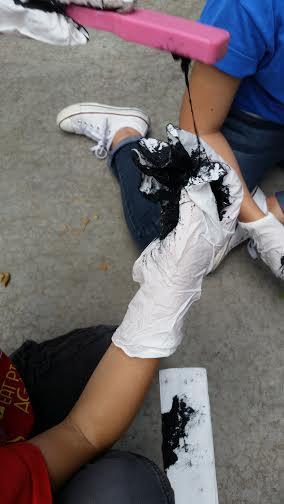
What Did We Learn? MOAR MESS! As we discovered with Mythbusters: the best programs for tweens are the ones where they can get elbows deep in making, touching, and creating stuff. It didn’t even have to be about the mess, it was just as much about the mixing and watching the reactions. We tweaked the formula a little too – more iron oxide made it more magnetic but we didn’t want it to become TOO liquid-y. Also there was no way we were having them put this near their mouths like on the blog. Leave that to actual guardians, hah.
Wednesday
Program: BristleBots
Ages: 7-12
Source: Library programs and maker-movements worldwide. Years ago I saw this demo’ed at a library conference and always had it on my list. We had done robot kits before and always had the BristleBots on our list so, again, another perfect chance. There’s lots of tutorials online: this is the one we used the most.
Total Cost: You can buy whole kits to make them, but they’re hard to find (sold out in every place I looked, shipping in 10-45 weeks) so we just bought parts. All together it cost a little over $30 to make 10. I got toothbrushes at the Dollar Tree, we used mounting tape, lithium coin batteries, and small pager motors. Here’s Melissa on why she chose to use the pager motors: “Having the copper leads already attached was crucial to this project. Otherwise we could have been doing all the attaching ahead of time or while the kids waited- it’s too fiddly for most 7-8-9- year old hands.”
Attendance: Exactly 10 kids. How perfect was that? (we don’t do registration, so this was a fingers crossed!)
How Did It Go? They were even MORE interested when Melissa hauled out the Legos and let them put the motors on the Legos. So there you go! But what’s not to like about tiny little vibrating robot?
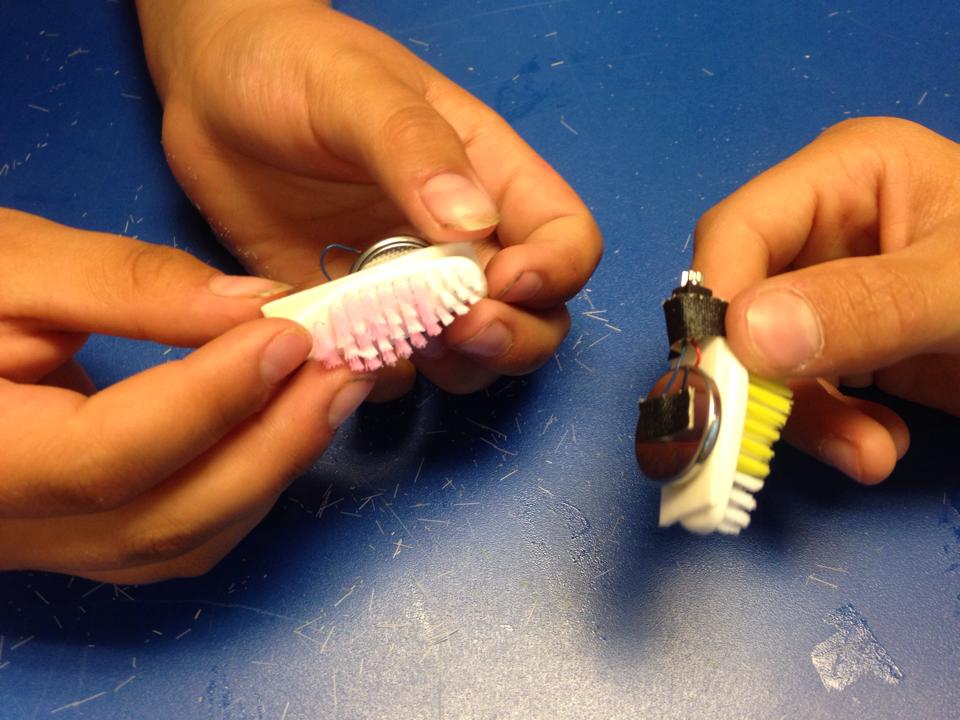
What Did We Learn? Yeah, we obviously needed smaller batteries, as you can see. OR we should have cut longer stems from the toothbrushes like in the guide we found. We also discovered that hot glue worked on the batteries as well, but it wasn’t as malleable. The fun came from putting the motors on other things too – like the Lego monsters or paperclips – to see how it worked. (but they really did like the toothbrushes.) And we could have made a better racing course or mazes for them, but that could be a second program with them. We’d definitely do it again and it was good to have a program for a slightly older skewing crowd that still appealed to and was possible for 8 year olds.
Thursday
Program: Geyser Science at Toddler Time
Ages: 3-5
Source: One of the amazing Amy‘s ALSC blogs from last year was about doing a Geyser Science session for school-age kids. I thought “Hey, why not age that down?!”
Total Cost: I guess about $16 for all the Alka-Seltzer tabs, heh. My boss drinks about a million mini-water bottles (8 oz) a day, so we have piles of them. They were perfect for this because they were just the right size for littler hands and didn’t need as much water.
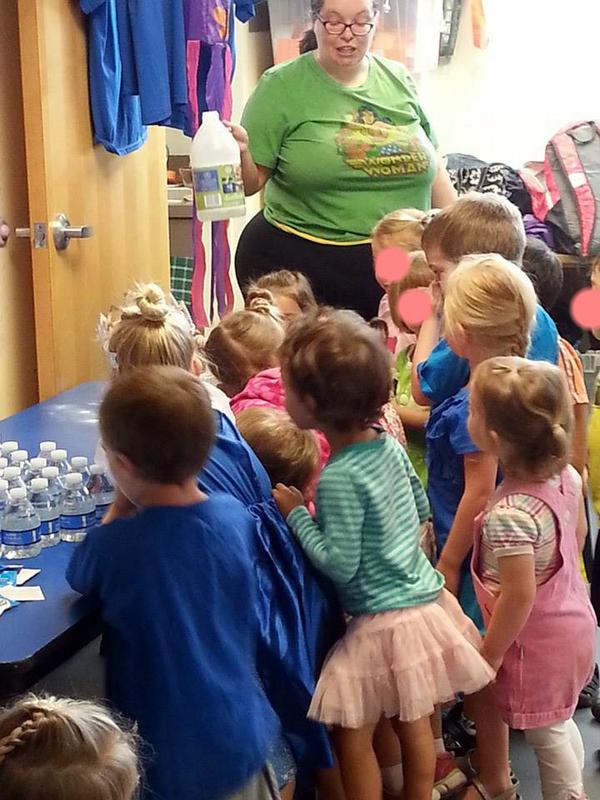
Attendance: We had this session twice: once at our branch’s Family Storytime where we had about 20 parents and kids participating at our main branch Toddler Time where we had about 40 parents and kids participating.
How Did It Go? Amazing, amazing, amazing. The kids loved it, the parents loved it: they did it over and over, they wanted to take sets home, they raved. One of the things that was great about this experiment was that it gave us some flexibility in presenting and talking about science concepts. When we had the Family Storytime, my colleague Chelsie chose to focus on sick day stories. This gave her a chance to talk about how germs are spread and to then segue into how Alka-Seltzer – or bubbly drinks – can sometimes help our stomach feel better when it’s upset and how liquid medicine can act quickly. BIG science concepts, right, but approachable by even young kids … especially when they get to see how that medicine works in a quick and bubbly way!
When I did the same experiment at Toddler Time the next day, I chose to focus on opposites instead. Why? Because the experiment would show us what reactions happens what opposites – bases and acids – come into contact. It would really give the kids a visual on what OPPOSITES mean. All of my stories and songs were about opposites.
Chelsie did her storytime outside over concrete and I did mine inside over buckets. Like I said: easily modifiable for the space you have to work with or other themes you can think of. (I think this would be a fun activity to do with stories about bubbles too.)
I started by showing them the most basic of opposite reactions: the classic vinegar and baking soda. Many of these small children had never seen it before and they. were. blown. away.
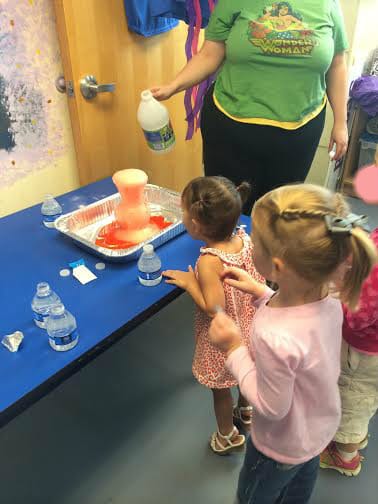
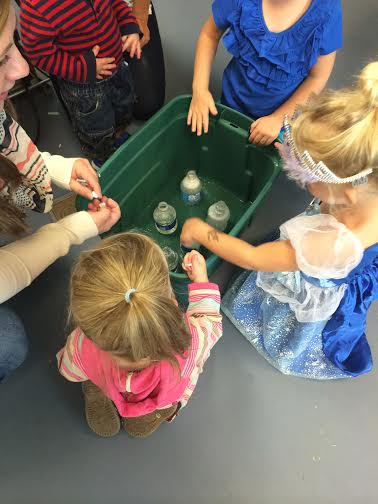
Then we were set for them to try. We set parents and kids up over these giant Rubbermaid containers. We made it clear that this was a perfect chance for parents to get directly involved because there was no way we could do it with every kid. They were pretty responsive and engaged which made it easy.
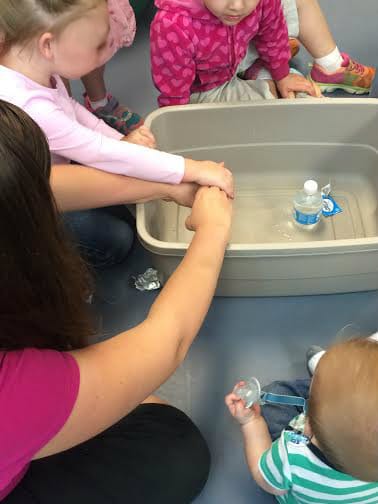
Here’s a Mom helping her kid hold her hand over a bottle. Note baby brother
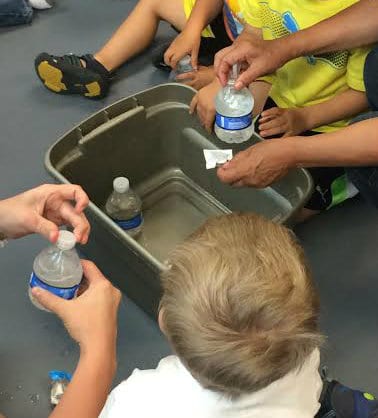
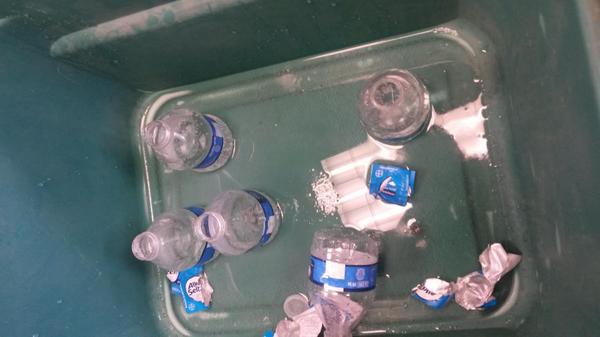
The wild leftovers. This bin was literally still fizzing it had so much Alka-Seltzer bubbled over in it.
Of COURSE that’s a girl in a full princess outfit with a crown on digging her hands in. OF COURSE IT IS. That’s the magic of science!
What Did We Learn? Don’t be afraid to scale activities down. Don’t be afraid to tackle big scientific concepts even with small kids – we had 2 year olds who were putting their hands over the bottles and watching them spill over. And even though Chelsie and I did totally different themes we used the same activity – with slight modifications, giving us a lot of interpretation room on either side. It was easier getting the parents involved when it was a one-on-one scenario. If it had been 10 kids around a bottle it would have been much harder all round but the individual bottles made sharing the Rubbermaid containers easier. On the way out all the parents and kids asked when we were doing a science activity again.
Program: Airplanes in Action
Ages: 7-12
Source: I saw a paper airplane kit at the Dollar Tree (y’all know how I feel about the Dollar Tree) and decided it would fit ScienceFest programming. I bought several sets.
Total Cost: $4 for the kits. Cheap!
Attendance: Like the magnetic slime program – and like most of our school year afterschool weekday programs – we had a low number show up just for the program. So! We went around the library and rounded up kids hanging out and pulled them into the program. That gave us 11 kids when it was all over and they didn’t want to leave once they started having fun.
How Did It Go? We had some simple hand-outs about why airplanes fly and why pieces of paper don’t so we opened with a discussion about that and simple aerodynamics. The kit had patterned paper and instructions to make cool looking planes and once we actually practiced the patterns so we could show them to the kids, it was actually pretty cool. The heavier paper made the planes fly longer and straighter and the kids loved the shapes and patterned paper. Inside each kit was a landing strip with points. We laminated them and set them up and had the kids aim for points. We also made a super-simple target made from a single piece of posterboard with holes cut out and scores on it (another Pinterest idea) and the kids LOVED THAT. They would have stood there all day trying to get the planes through the specific circles.
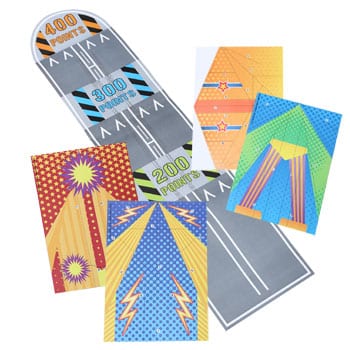
Here’s a sample of the runways and the patterns. Good value! Go check out your Dollar Tree in the craft aisle to see if they have some.
We took Friday off since we didn’t have a regularly scheduled programs and we get lower attendance (school age) on Fridays. And we had to rest up for ExpoDay!
Saturday
Program: Is It Magnetic? at ExpoDay
Ages: All ages
Source: my burning desire to use magnet wands.
Total Cost: $13 for the set of six magnet wands.
Attendance: Over the course of four hours, we outreached to at least 250 patrons and performed the experiment with around 175 kids, teens, and adults too.
How Did It Go? We created simple testing sheets for the kids to make their hypotheses on. Then we handed over the magnet wands and let them test each item and record the findings. We did something similar a few years back with WILL IT SINK OR FLOAT and I just think these are the best kinds of experiments for all ages – it gives you a chance to explain what a hypothesis is, how science is about testing and not being right or wrong, how you can only find out the RIGHT answer by doing the testing yourself. And we got to celebrate with all the kids about how they were scientists, which they loved and is great language to use. When they completed they got some cheap prizes we had left over – parachute people, foam gliders, balloons, and stickers.
They LOVED using the wands, they loved being surprised (by the pipe cleaner and the soda tab – that one got them all and lead to lots of great conversations), and they loved being right too.
In a career highlight moment, one parent stopped by, observed the kids hard at work with the magnets and testing sheets and then asked if we were from the National High Magnetic Field Lab (a real thing in our town!) HAHAHA NO SIR BUT THANK YOU FOR ASKING, HAVE A BALLOON!
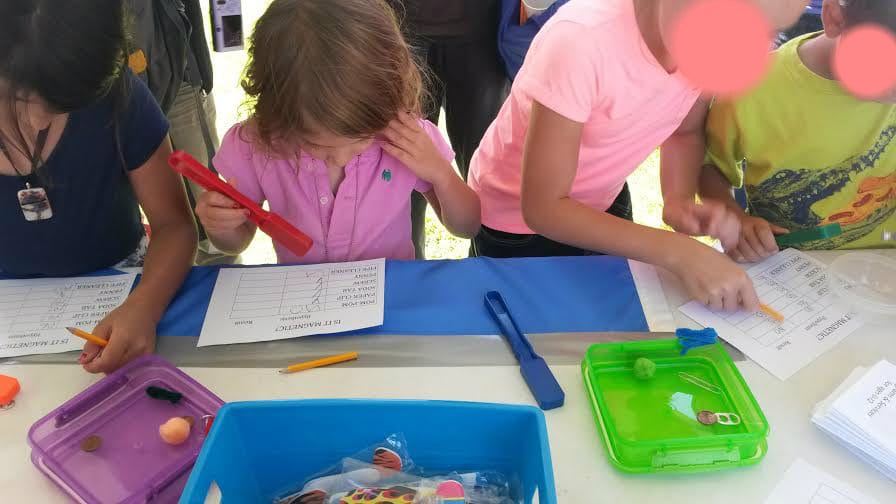
Hard at work doing SCIENCE! (the objects we chose were: a pom-pom, a penny, a paper clip, a soda can tab, a pipe cleaner, and a screw.)
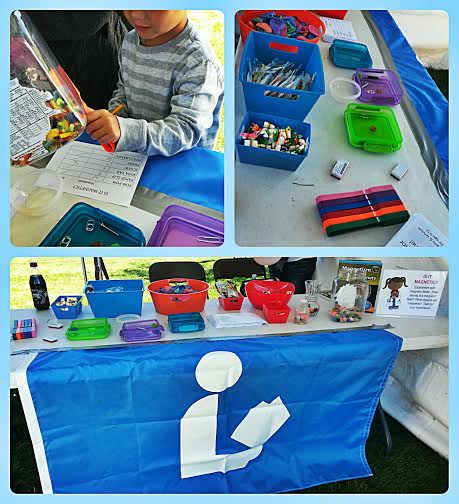
The set up of our table.
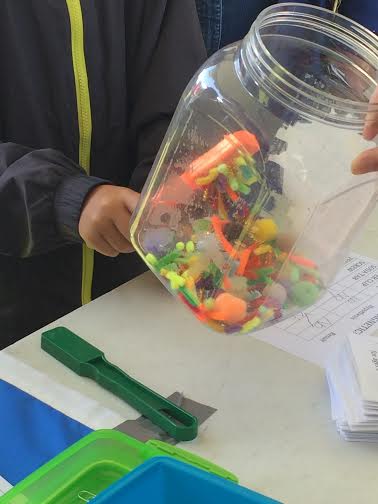
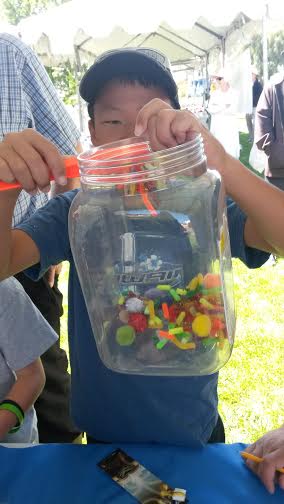
We also had some containers (see right side of the table) that had pieces of pipe cleaners and pom-poms inside. One was a glass vase, one was a giant plastic bucket, and one was a smaller plastic bottle. We let the kids drag the wands along the sides to show how the pipe cleaners followed along. This was great to have on hand for the younger kids (I literally had to pry it out of the hands of a toddler at one point.) and no matter their age, they loved playing with the big plastic bucket. This was a Pinterest idea I expanded/modified a bit and it was a last minute addition, but I was so glad we had it! Everyone was absolutely fascinated and delighted with this!
WHEW! So there you have it! Our Chamber of Commerce reported that over 9 days there were 90 events with over 5,000 people attending. That seems like most of the people who showed up at the library. 🙂 In all, we had a great slate of events. While there was definitely some prep time for each program, it wasn’t anything that felt out of control. Ditto with the costs. And, of course, I was helped by my great team of colleagues and facilitators – Chelsie, Melissa, Stephanie made these events possible.
I’m not sure WHAT we’ll offer for next year’s ScienceFest, but I know we’ll be part of it.
What’s the number one thing we learned? I think it’s that STEM activities really CAN be put into all the programs you already offer and for all ages and that they fit right in with what a library offers to a community of children and teens and, well, learners. I think we also discovered that we could both find great inspirations and try changing them in a variety of ways so why not JUST TRY?!
You might not have a ScienceFest in your town (or a National High Magnetic Field Lab) but you can JUST TRY too. If you have questions about any of the programs I laid out here, suggestions or stories about what kind of STEM programs work for you or that you want to try – I wanna hear all about it! Leave me a comment here or talk to me on Twitter.

I just finished working Oktoberfest with the local brewery and have some thoughts about whether we could have a LibraryFest– would people of all ages comes back more than once in a week if we did it?! If I blog about my ideas I’ll definitely link to this post.
GO BIG OR DON’T BOTHER! Such a cool mantra.
Angie, this is fantastic! What an awesome week of programming; thank you for sharing it with us!